

Onsite video production is the practice of capturing professional-grade video content directly at a chosen location, using purpose-built equipment, detailed pre-production planning, and real-time adjustments to deliver versatile, high-quality footage. Also called location video production or field production in broadcast contexts, it covers everything from corporate conference coverage and executive interviews to branded lifestyle campaigns and multi-day event documentation. This guide walks you through the equipment, shoot-day execution, filming techniques, and post-shoot workflows that separate polished, platform-ready deliverables from footage that never makes it past the editing room.
What does an onsite video production guide actually cover?
The short answer: everything that happens before, during, and immediately after the camera rolls at your location. Most production failures trace back to gaps in pre-production, not poor camera work. Stakeholder alignment on vision and schedule is the single factor that most determines whether a shoot day runs on time and on budget. That means your shot list, call sheet, and permissions paperwork carry as much weight as your camera package.
A well-structured location video shoot guide also accounts for multi-format delivery. Platforms like LinkedIn, Instagram Reels, and YouTube each require different aspect ratios, so experienced crews plan to capture both horizontal 16:9 and vertical 9:16 formats from a single shoot day. That planning decision alone doubles the content output without doubling the production cost.

What tools and pre-production steps ensure a successful onsite video shoot?
Arriving on location without a production checklist is the fastest way to burn budget. The gear list and planning documents below represent the baseline for any professional field shoot.
Core equipment for location shoots
- Cameras: At minimum, two camera bodies (Sony FX3, Canon EOS C70, or equivalent cinema-grade options) to enable multi-angle coverage and a backup in case of hardware failure.
- Lighting: A three-point lighting kit using LED panels such as Aputure 300X or Nanlite Forza 60B handles most interior interview setups; add a portable reflector for outdoor work.
- Audio: Lavalier microphones (Rode Wireless GO II or Sennheiser EW 100 G4) paired with a boom mic and a field recorder like the Zoom H6 give you redundant audio capture. Audio quality is the key factor separating amateur from professional results on location.
- Stabilizers: A gimbal such as the DJI RS 3 Pro for moving shots, plus a fluid-head tripod for static setups.
- External monitors: A 7-inch monitor like the Atomos Shogun or SmallHD Focus 7 mounted on the camera rig lets the director and client review footage in real time.
- Power and storage: Bring twice the batteries and memory cards you think you need. Running out of either mid-shoot is an avoidable crisis.
Planning documents that protect your shoot day
Detailed shot lists and call sheets align every stakeholder, from the client’s communications director to the on-set PA, on what gets captured and when. A call sheet specifies crew call times, location addresses, parking logistics, and talent schedules. A shot list breaks the day into discrete setups: wide establishing shots, medium interview frames, close-up product details, and b-roll sequences. Without both documents, crews improvise, and improvisation costs money.
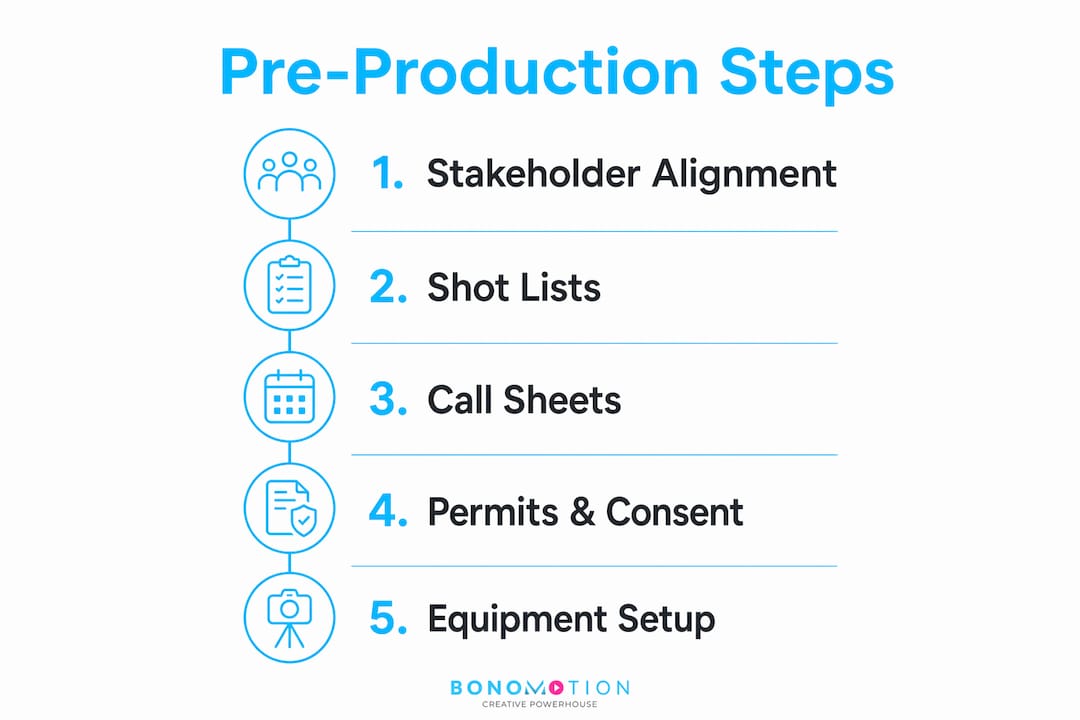
Consent forms and location permits belong in the same pre-production package. If your shoot involves identifiable individuals or takes place in a venue with filming restrictions, secure written releases before the day. For multi-format capture planning, note on the shot list which setups require a vertical reframe so the camera operator adjusts composition before rolling.
Pro Tip: Build 15 to 20 minutes of buffer time between each major setup on your call sheet. Production buffers provide essential flexibility for technical re-adjustments, talent breaks, and quick reshoots. Crews that skip buffers routinely run 45 to 90 minutes over schedule by midday.
How to execute the shoot day for optimal footage and talent performance
Shoot day execution follows a predictable sequence when pre-production is solid. Here is the workflow Bonomotion’s crews use on corporate and event productions:
- Arrive early and conduct a location walkthrough. Identify power sources, ambient noise risks (HVAC systems, nearby construction), and natural light shifts throughout the day. What looks clean at 9 a.m. may be backlit by noon.
- Build and test all equipment before talent arrives. Set up cameras, lighting, and audio, then record a two-minute test clip and review it on the external monitor. Confirm audio levels, color temperature, and focus before the first subject steps on set.
- Brief talent before rolling. Explain the shot sequence, where to look, and how to handle mistakes (pause, reset, and continue rather than stopping the entire take). Confident, natural performances come from talent who understand the process, not from repeated takes.
- Capture multiple angles simultaneously. Two-camera interview setups enable dynamic editing and authentic storytelling by giving the editor cut points that feel natural rather than forced. Camera A holds the primary medium shot; Camera B captures a tighter angle or a slight profile.
- Monitor footage live throughout the shoot. Live monitoring with external monitors lets the director verify audio and visual quality in real time, catching exposure drift, focus pulls, or mic drop-outs before they become post-production problems.
- Execute planned buffer time deliberately. Use scheduled breaks to review key clips with the client, adjust lighting for the next setup, and give talent a genuine rest. Rushed talent delivers flat performances.
Pro Tip: Ask your on-camera subjects three warm-up questions before the official interview begins. These questions never appear in the final cut, but they shift the subject’s body language from stiff to conversational, which carries into the recorded material.
What common onsite filming techniques boost video quality and engagement
The difference between footage that holds attention and footage that loses it often comes down to four craft decisions made on set.
Framing and composition
Applying the rule of thirds and avoiding plain, distracting backgrounds creates compelling visual storytelling that keeps viewers engaged. Place your subject’s eyes on the upper horizontal third of the frame, and position them left or right of center to create visual tension. For vertical 9:16 formats, recompose so the subject fills the upper two-thirds of the frame, leaving space for on-screen text overlays at the bottom.
Lighting for clarity and professionalism
Three-point lighting (key light, fill light, backlight) remains the standard for interview setups because it separates the subject from the background and eliminates unflattering shadows. In venues with strong ambient light, match your LED color temperature to the existing source (daylight at 5600K, tungsten at 3200K) to avoid mixed-color skin tones that look unprofessional on screen.
Audio capture and noise management
- Position lavalier microphones 6 to 8 inches below the chin, hidden under a collar or lapel, to capture clean voice without clothing rustle.
- Run a boom mic as a backup channel on a separate recorder track, set 6 dB lower than the lav to prevent clipping.
- Scout for HVAC vents, refrigerators, and exterior traffic before finalizing your setup position. Moving the interview 10 feet can eliminate a noise floor that would otherwise require hours of post-production noise reduction.
- Monitor audio through closed-back headphones (Sony MDR-7506 is the industry standard) throughout every take.
Interview and b-roll strategy
Capturing behind-the-scenes moments, client interactions, and candid staff footage enriches content diversity and authenticity in ways that scripted setups cannot replicate. Plan 30 to 45 minutes of dedicated b-roll time after interviews wrap. Shoot hands on keyboards, product close-ups, team discussions, and environmental details. This footage becomes the visual layer that editors use to cover interview cuts and add production value without additional shoot days.
How to troubleshoot onsite challenges and prepare for post-production success
Even well-planned shoots encounter problems. The crews that deliver consistently are the ones who anticipate issues and resolve them without disrupting the schedule.
Common problems and real-time solutions:
- Bad audio: If a lav mic picks up interference or clothing noise, switch to the boom track immediately and reposition the lav during the next break. Never continue recording on a compromised audio channel.
- Lighting shifts: Cloud cover and window light change throughout the day. Assign one crew member to monitor the key light source and adjust LED output or add diffusion as needed.
- Talent nerves: Slow down, not up. Give the subject a two-minute break, reset the conversation informally, and re-approach the question from a different angle. Pressure accelerates nerves.
- Equipment failure: This is why you bring backup bodies, duplicate audio channels, and extra storage. A single-camera shoot with no backup is a liability, not a budget decision.
Post-shoot data management
A structured post-production workflow including metadata entry, captioning, and format optimization produces consistent, polished deliverables across platforms. Immediately after the shoot, back up all footage to two separate drives before leaving the location. Label folders by scene, camera, and take number so editors can navigate the project without a scavenger hunt.
Pro Tip: Plan for captions and subtitles before post-production begins, not after. Specify caption format requirements (SRT, VTT, or burned-in) in your pre-production brief so the editor builds them into the workflow from the first assembly cut. Retrofitting captions after picture lock adds time and cost.
| Challenge | Real-time solution |
|---|---|
| Audio interference or noise | Switch to backup boom track; reposition lav mic at next break |
| Shifting ambient light | Assign a crew member to monitor and adjust LED output continuously |
| Talent performance issues | Take a two-minute break; reset conversation informally before re-rolling |
| Equipment failure | Activate backup camera body or audio recorder immediately |
| Schedule overrun | Execute pre-planned buffer time; reprioritize shot list with client approval |
Key takeaways
Successful onsite video production depends on thorough pre-production, disciplined shoot-day execution, and a structured post-shoot workflow that prepares footage for multi-platform distribution.
| Point | Details |
|---|---|
| Pre-production determines outcomes | Shot lists, call sheets, and stakeholder alignment prevent budget overruns and schedule failures. |
| Multi-format capture multiplies content value | Shooting 16:9 and 9:16 simultaneously doubles platform-ready output from a single shoot day. |
| Live monitoring prevents costly fixes | External monitors catch audio and exposure issues in real time, before they reach post-production. |
| Production buffers protect quality | Scheduling 15 to 20 minutes between setups accommodates reshoots, talent breaks, and adjustments. |
| Post-shoot data discipline saves editing time | Dual-drive backups, labeled folders, and early caption planning reduce post-production hours significantly. |
What 20 years of location shoots have taught me about production discipline
The most common mistake I see organizations make is treating pre-production as optional overhead. They arrive on location with a rough idea of what they want, a single camera operator, and no shot list. Three hours in, they have 40 minutes of unusable footage and a talent who has given everything they had to takes that will never make the cut. The shoot day is not where you figure out what you want. It is where you execute what you already decided.
The second pattern I have observed consistently is underestimating audio. Organizations will invest in a cinema-grade camera package and then record audio through the camera’s built-in microphone. The visual quality is irrelevant if the audio sounds like it was captured in a parking garage. A Rode Wireless GO II costs less than a single hour of post-production noise reduction, and it solves the problem at the source.
What I find most underutilized in corporate and event production is the multi-format capture strategy. Organizations shoot a 16:9 conference recap and then wonder why their LinkedIn and Instagram content looks like a cropped afterthought. Planning vertical compositions from the start, not as a post-production crop, produces social content that performs like native content because it is native content.
The crews and organizations that get the most from their shoot days share one trait: they treat the production schedule as a creative tool, not a constraint. Buffer time is not wasted time. It is the space where the best unrehearsed moments happen, where talent relaxes enough to say something genuinely compelling, and where the director has room to try one more angle that ends up being the hero shot.
— Bernard
Work with a production team that executes every detail
Bonomotion has been executing high-impact location shoots for Fortune 100 companies, growing brands, and multi-day conferences since 2003. Every project is led by an experienced producer who aligns your objectives, audience, and timeline before a single camera rolls. From corporate video production with multi-format deliverables to full-scale commercial video services across Florida and nationwide, Bonomotion operates as a true extension of your organization. If your next event, executive interview, or brand campaign deserves footage that performs across every platform, connect with the Bonomotion team to discuss your production goals.
FAQ
What is onsite video production?
Onsite video production is the process of capturing professional video content at a specific location using purpose-built equipment and pre-planned logistics, rather than in a controlled studio environment. It covers corporate events, executive interviews, branded campaigns, and multi-day conference documentation.
How long does a typical location video shoot take?
Most corporate interview and event shoots run between four and eight hours on location, depending on the number of setups, talent, and formats required. Production buffers built into the schedule are standard practice among experienced crews and add 15 to 20 minutes per major setup.
What equipment do I need for a professional onsite shoot?
A professional location shoot requires at minimum two camera bodies, a three-point LED lighting kit, redundant audio capture (lavalier plus boom), a stabilizer, and an external monitor for live quality review. Backup batteries, storage cards, and a field audio recorder complete the core kit.
Why does pre-production matter so much for location shoots?
Most onsite production success is determined in pre-production through stakeholder alignment on vision, shot lists, and schedule. Skipping this phase leads to missed shots, budget overruns, and footage that cannot be repurposed across platforms.
How do you capture video for both horizontal and vertical platforms in one shoot?
Plan dual compositions on your shot list before arriving on location. Camera operators frame the primary 16:9 shot with enough headroom and side space to recompose to 9:16 without losing the subject. Multi-format delivery from one shoot day is standard practice at experienced agencies and doubles usable content output without additional production cost.